Showing posts with label repurposing something old. Show all posts

3.14.2014

turning a trampoline into a chicken run


Confession: my once-given status of "crazy chicken lady" has been significantly reduced to "woman that once bought chickens and eventually left it to her husband to be the one who remembers to feed and water them" (clearly that's a conceptual reduction and not one of title, yeesh).

But let's not talk about that.

I built a run for the chickens over a year ago out of some pretty crude materials. I've been amazed it's lasted as long as it has and how sufficient is has been, but two nights ago we had insanely strong winds whipping about our spot on the map. When Ava and I went out yesterday to play in the back yard I discovered that the run had completely collapsed on one side, likely from those strong winds and just being past its prime. Moreover, there was a gaping open space at the top of it so that if the unclaimed treasures pooled their collective brain power they could possibly figure out that one good hop straight up would be their path to freedom and danger. I realized all of this at about 1:45 yesterday afternoon. I'm headed out of town for the weekend today, but I knew the chickens couldn't stay exposed and vulnerable until Monday - and I couldn't leave my husband and kids with the potential of having to chase errant chickens around the back yard - so a quick plan had to be devised.

Here's what we did. The kids had a trampoline that the previous homeowners generously left. We got a lot of mileage out of it, but it has really seen its last day, at least by way of safety measures. I got the idea that if I took the mat off, I could move the frame over to the chicken coop, cover the entire area in chicken wire, and the girls would have a new, sturdier, very weather-proof, bigger run.

Here's how Anthony decided to finish off the destruction of the trampoline mat . . .


This is what had happened to the existing run. It looks like a pile of trash.
"Hey, what the flock is going on here?" - chickens
The only materials I needed to purchase for this project was two new rolls of metal chicken wire. On this previous run I used a combination of metal and plastic wire. What I learned from the experience was that within a year the plastic wire becomes completely brittle and just tears apart if you look at it cross-wise. So again, I purchased only the metal fencing and one spool of cuttable wire so that I could affix all of it together and knit up any gaps. All total it cost me $50.00 and three to four hours of time spread out over yesterday afternoon, evening, and this morning.

Here's the finished product.


I may have been demoted from crazy chicken lady, having lost a little fervor. But this work was so cathartic and a reminder of how much I love being outside, working with my hands...and those silly birds.

3.28.2013

And we're back...


Alright.  Things are about to get wonky (temporarily) around here.  A year ago I left blogger for another web hosting site.  A year later, I'm coming back.  I missed blogger.  Oh, what a wayward child I've been.

Everything from there will make its way back over to here for my own archival purposes.  But for my sanity, I press on afresh.

Lots to be said.  Some of it, hopefully, interesting.  And maybe, someone will once again read it...

2.13.2012

Tables Turned

Well, it's Monday.  Again.  The weekend was crazy busy.  There's laundry to do, dishes to wash, mouths to feed, groceries to be gotten, bills to pay, schedules to coordinate, homework to be done.

So I painted my kitchen table.

I love our table.  It belonged to my great-grandmother and is beautifully worn and old and sturdy.
Buzz's photo bomb
Countless meals have been had here.  My mom did her homework here.  It's the only table Ma Luffin Mayun and the us-es have ever had.  I think the table is Poppins-esque perfect since my bend is to things that wear their years and can stand up to the beating we'll most likely give them.
But then mom sent me a link and suggested I put the same spin on my own table.  I was down with it.

Two words: chalkboard paint.
after the first coat
It took three coats to cover, and only about an hour and a half from start to finish.  After the paint is dry you cover it in chalk and then wipe it off to sort of set and condition the finish.
And voila.  Done.  An hour and a half, $2-worth of a $10 quart of paint, and a $0.68 paintbrush.
this is my sentiment most days
I also painted the top of the chairs.  You know, in case we ever forget where we're supposed to sit or each other's name.
look at my junky counter
no, don't
So there you have it.  Another project done, another everyday, commonplace to-do list ignored.

Take that, Monday.
Now to actually decide on dinner...

8.14.2011

Very Pinteresting

Yeah, I know.  But I'm back.

And I am now in love with Pinterest.  I think it might be the real thing this time.

I repinned this image from CassieVivi's board of a frame that had been repurposed into a kind of momentos keeper/bulletin board/work of art.

I've been holding on to the frame of an old, long-ago-broken mirror Ma Luffin Mayun's grandmother, DorothyLee, gave me.  She is so often my benefactress in all things vintage and fabulously worn.  She has quite the same eye for things as I do.  I love that.  I've kept the frame for years occasionally contemplating what to do with it.  Paint?  Decoupage?  Because of the combination of seeing this on Pinterest and Ma Luffin Mayun returning from Asia with a plethora of dear keepsakes, the idea came.

I took some basic wire that I had recently purchased for a jewelry-making project I've undertaken.  Using the wire, a pair of scissors, and about twenty minutes of my evening, I came up with this...

I kind of love it and look forward to watching the collection on it grow.  It's a perfect answer to the question of where to put things that we find special or important, but that don't necessarily lend themselves to having a particular place for storing or displaying.

A beautiful bag that held souvenirs from the journey, some Korean coins,
and the brochure from the english camp with the team members' pictures

I just used basic paperclips to hold everything onto the wire.  I love the idea of clothespins and will most likely play around with different ways of affixing the items to the frame.

A fan from Korea and one of my favorite things: a flower made out of wool from Scotland
sent to me by my KakiBlack


Hanging in the corner of our bedroom.
So there you have it, my rip-off of someone else's idea.  Now go rip something off of somebody else and have fun while you're at it.

And beware of Pinterest . . .

6.28.2011

Cut and Paste

My SisterFriend set a schedule for herself and her kids this June that gave each weekday a theme:
Make-It Monday (making something crafty or from-scratch)
Low-Tech Tuesday (a day with little time spent on technology)
Wet Wednesday (pool time!)
Thoughtful Thursday (doing something for someone else just because)
Free Friday (no big plans)

How creative.  How inventive.  How "I-better-get-a-plan-cause-school's-out-and-I'm-about-to-be-outnumbered".  Whatever the motivation, I think it's brilliant and that our zoo-crew may put a spin on something like this for the remainder of the summer.

If I had thought about it earlier, I would have gotten her to write a guest blog and talk about how this schedule went in the month of June.  Today was her final official June 2011 Make-It Monday.  I wonder what she did today...

Here's what I did.

I have been working to carve out and sharpen up our home office.  Our house has a formal dining room that we use as the library.  This room is definitely at the tippy-top of my list of favorite things about our house.  By no means is it a big room, but there is just something about it.  It is warm and cozy.  We all seem to pile into it on occasion; to read or color or listen to records or watch fish swim or all of the above.  It's a great room.  And it is an ideal space to incorporate a workspace into because of its warmth and comfort, and because the kids can pile in and stay occupied while we work.  That last point is pretty important because no matter what we try, the kids can't be kept away for long.  Where we are, they are there.  How sweet.  How suffocating.  How short-term.  I will enjoy it - or at least make it work - while it lasts.

One of my website regulars over the past few years has been The Unclutterer.  I enjoy the site so much that I bought the ebook about a year ago.  One of the concepts she introduces is having a "landing strip" in the house that is designated as a sort of catch-all for when you come in the door - mail, papers to be filed, keys, electronics charging station, etc.  We have a cut-through from a hallway into our library that is the perfect space for a landing strip.  From the beginning of living here, that is exactly where we have designated the landing strip to be.  The breakdown, however, is that the other elements of organization - a desk in our bedroom and a filing cabinet in our closet - were nowhere near the landing strip.  Even utilizing the landing strip concept, we still had no central "office".  This translates into things landing on the landing strip but never making the way to their final destinations, i.e. papers to be filed never getting filed because nobody wants to lug them from the landing strip to the closet, etc.  Today, I remedied all of that.

The desk and filing cabinet now happily live in the library - this sweet, inspirational, convenient space full of antiquities of our own past and the pasts of others.  Bringing it all together into the room makes too much sense and seemed right from the second the epiphany struck.  I love the idea of sitting in that room and writing, filing, sorting, and keeping order of our personal affairs.  What I didn't love was the eye-sore of a filing cabinet in this room that holds all kinds of unique, sentimental, and nostalgic bits of life.  I want the room to be functional as an office, but I don't want to lose the charm that the room has held for us by filling it up with cold, uncreative pieces.


I know it's just a filing cabinet, and a filing cabinet does not necessarily a room make or break.  But we can do better than this, I think.  A little thought later, I pulled out some supplies I already had and got to work transforming the cabinet.


The supplies: decorative paper, glue, scissors, and
paint brushes


 This was nothing more than a decoupage project, really.  I tore paper at my own whim, sort of got an idea where I wanted to paste it, painted glue on the back of the paper, and stuck it to the filing cabinet.

Painting the glue on the paper

The first piece applied
 
I continued tearing and gluing paper, layering it up on the cabinet.  On the top of the cabinet I chose to put a map of Prince Edward Island, one of my favorite I've-never-been-but-you-can-bet-your-booty-I'm-going places.  Once all of the paper was glued into place, I sealed it all with an application of enamel glaze I had left from centuries-old crafting projects.


After I sealed everything, I wanted a slightly more finished look to the cabinet, so I decided to paint the trim of the cabinet in black.  I knew black acrylic paint would easily peel off of the metal cabinet.  I tried a Sharpie but realized quickly that wasn't going to cut it.  Determined not to have to leave the house or purchase anything for this little impromptu project, I got creative and pulled out this...
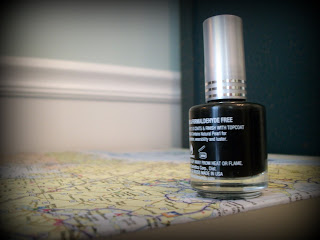
Yep, black nail polish did the trick.

I couldn't be more pleased with the total finished product.


I remembered I had xeroxed copies of some Athens, Ga. history on
Ma Luffin' Mayun's family.  I added them to the cabinet.
So, once again, everything old is new again.  I love how something so simple can bring change in just the right dose.  And I love this room.  Here's to more time spent within it's walls, reading, writing, laughing, and living.

my helper

...and don't believe everything you read.  I assure you,
it was her.